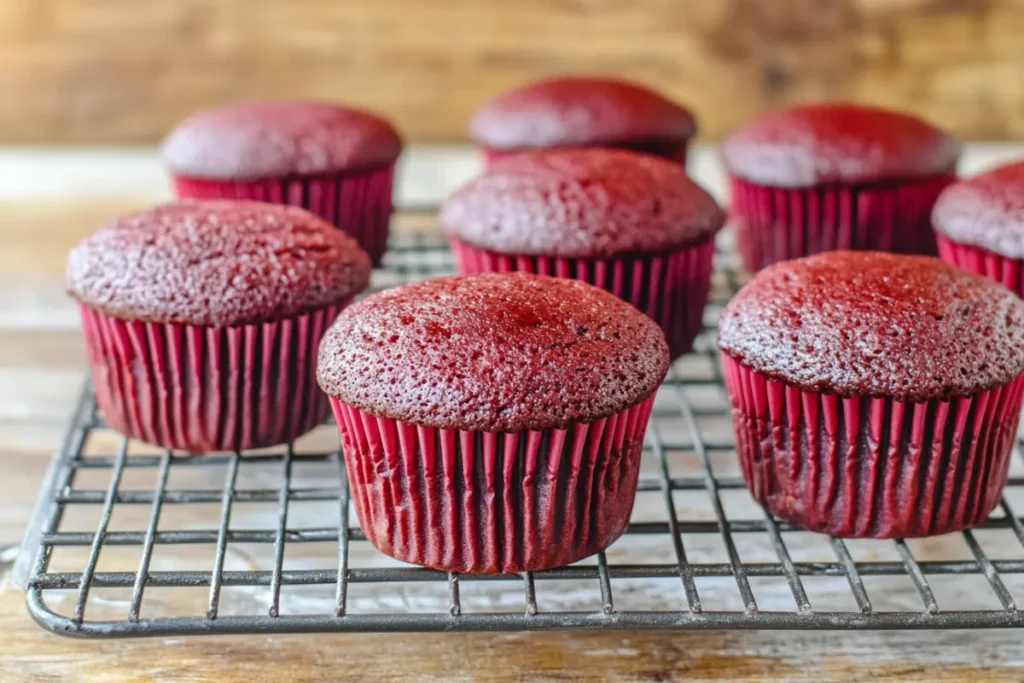
Craving something sweet yet allergen-friendly? You’re in for a treat! This guide on How to Make Gluten-Free Red Velvet Cupcakes covers every step to create moist, fluffy, and gluten-free red velvet cupcakes that are as delicious as traditional ones. From selecting the right ingredients to perfecting your frosting, we’ve got you covered. Get ready to impress everyone at the table, whether they’re gluten-free or not!
Introduction and Overview
Why Choose Gluten-Free Red Velvet Cupcakes?
Choosing gluten-free desserts doesn’t mean compromising on flavor or texture. Whether you’re baking for a loved one with gluten sensitivities or simply exploring healthier alternatives, these gluten-free red velvet cupcakes check every box. The vibrant red hue, soft crumb, and subtle cocoa flavor make them ideal for birthdays, parties, or a simple indulgence at home.
Plus, going gluten-free opens doors for creativity, like experimenting with flours and flavor profiles. These cupcakes are not just a dessert—they’re a testament to the art of inclusive baking!

Understanding Gluten-Free Baking Basics
Gluten-free baking requires a bit of finesse, but don’t worry—it’s not rocket science! The absence of gluten, which gives traditional baked goods structure, means you’ll need to rely on alternative flours and careful techniques.
Struggling with dryness or crumbly texture? Understanding the role of different flours can make a huge difference. Learn more in our guide to gluten-free flours.
Key tips include:
- Using a gluten-free flour blend specifically designed for baking.
- Balancing wet and dry ingredients to maintain moisture without compromising structure.
- Avoiding overmixing, as it can make your cupcakes dense.
When done right, these red velvet cupcakes will have the same soft, velvety texture you love, minus the gluten. In the next section, we’ll explore the star ingredients that make this recipe a winner!
If you’re new to gluten-free baking, our ultimate gluten-free cupcakes guide covers the basics to set you up for success.
Ingredients and Substitutions
Key Ingredients for Gluten-Free Red Velvet Cupcakes
Mastering gluten-free red velvet cupcakes begins with thoroughly understanding the role of each ingredient. Furthermore, knowing how they interact ensures success. In addition, selecting the right combination of ingredients is key to achieving cupcakes that are soft, flavorful, and visually stunning. Moreover, attention to detail during preparation can make all the difference between a good batch and a great one. Therefore, to help you on your baking journey, here’s everything you need to know about choosing and using the perfect ingredients!
Gluten-Free Flour Options
When it comes to gluten-free baking, the type of flour you choose is crucial. Almond flour is a favorite for its mild nutty flavor and ability to keep cupcakes moist. On the other hand, rice flour, a versatile staple in gluten-free baking, provides structure and a smooth texture.
Blends are often the best option for beginners, combining almond or rice flour with tapioca or potato starch. These pre-mixed flours mimic the properties of wheat flour, delivering a balanced crumb without any grittiness.
- Pro Tip: Always sift your gluten-free flour to prevent lumps and ensure an even batter. This simple step makes a huge difference!
The Role of Cocoa Powder in Red Velvet
For that signature red velvet taste, you only need a touch of unsweetened cocoa powder. Two tablespoons are typically enough to enhance the flavor without overwhelming the color.
- Substitutes: If cocoa isn’t an option, carob powder is a great alternative. It’s naturally sweet and works well with the tangy notes from the buttermilk.
Other Essential Ingredients
- Buttermilk Alternatives for a Creamy Texture
Buttermilk provides moisture and tanginess, which are essential in red velvet recipes. If you’re dairy-free, mix one cup of almond or oat milk with a tablespoon of lemon juice. Let it sit for 5 minutes to curdle before using. - Natural Red Food Coloring Options
Avoid synthetic dyes by using beetroot powder or plant-based liquid food colorings. They’re not only healthier but also add a natural vibrancy to your cupcakes. - Leavening Agents: Baking Soda and Vinegar Chemistry
The combination of baking soda and vinegar is a game changer. The vinegar reacts with the baking soda, creating bubbles that help the batter rise, resulting in light and fluffy cupcakes.
Tools and Equipment
Must-Have Tools for Gluten-Free Baking Success
Baking gluten-free red velvet cupcakes becomes much easier and more enjoyable when you have the right tools at your disposal. These essentials ensure precision, efficiency, and professional results.
Stand Mixers, Cupcake Trays, and Liners
A stand mixer or a hand mixer is your go-to for creating a smooth, lump-free batter. Mixing thoroughly yet gently is crucial for gluten-free baking. Pair it with a non-stick cupcake tray to prevent uneven baking. Don’t forget sturdy liners—they make removing and serving the cupcakes effortless.
Specialty Tools for Decorating
For stunning cupcakes, invest in piping bags and tips. A star or round tip creates professional-looking swirls with minimal effort. Want to elevate your decoration game? Edible glitter, sprinkles, and stencils add a wow factor, turning simple cupcakes into showstoppers.
Using a Sifter for Lump-Free Dry Ingredients
A sifter is indispensable when working with gluten-free flours. It helps aerate the flour and removes any clumps from the cocoa powder or sugar. This step is especially important for achieving a light and velvety cupcake texture.
How to Make Gluten-Free Red Velvet Cupcakes? Step-by-Step Instructions

Preparation
- Preheating the Oven and Preparing the Cupcake Liners
Preheat your oven to 350°F (175°C). A properly preheated oven ensures even baking and prevents undercooked centers. While the oven heats up, prepare a 12-cup cupcake tray with liners. Choose decorative liners for an extra pop of color! If using silicone molds, lightly grease them with a neutral oil or spray. This step ensures the cupcakes won’t stick, making cleanup easier. - Assembling and Measuring Ingredients
Baking is all about precision, especially when working with gluten-free flour blends. Measure all your ingredients ahead of time to avoid mistakes. Use a digital kitchen scale for dry ingredients like flour and sugar, and liquid measuring cups for wet components like buttermilk or almond milk. Organizing everything beforehand will make the process smoother and stress-free.
Mixing the Batter
- Combining Dry Ingredients
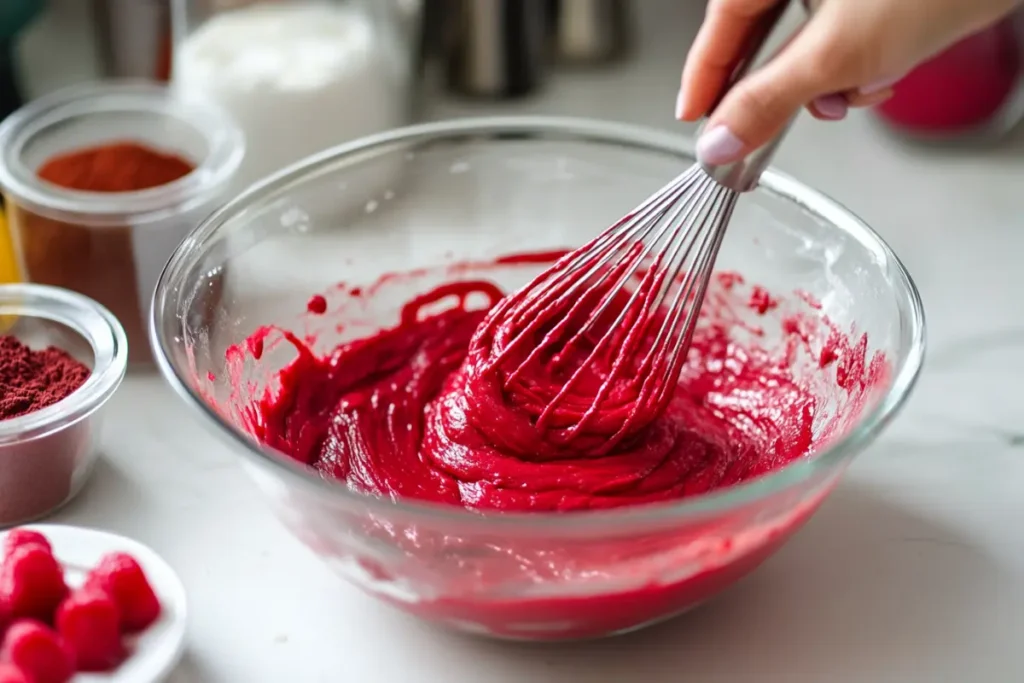
In a large mixing bowl, sift together the gluten-free flour blend, cocoa powder, baking soda, and a pinch of salt. Sifting not only removes lumps but also aerates the mixture, resulting in lighter cupcakes. Whisk the dry ingredients gently to ensure they’re evenly combined. - Mixing Wet Ingredients and Blending with Dry
In a separate bowl, whisk together the sugar, eggs, oil, and buttermilk (or its substitute). Add the vanilla extract and natural red food coloring, mixing until smooth. Gradually incorporate the dry ingredients into the wet mixture, folding gently to avoid overmixing. Lastly, stir in the vinegar, which activates the baking soda for a beautifully airy texture.
Baking the Cupcakes
- How to Evenly Fill Cupcake Liners
Use a scoop or large spoon to fill each liner about two-thirds full. This ensures enough room for the cupcakes to rise without spilling over. Evenly filled liners lead to uniformly baked cupcakes, giving them a professional look. - Baking Time and Temperature for Best Results
Place the tray on the center rack of your preheated oven. Bake for 18–22 minutes, but keep an eye on them! Test for doneness by inserting a toothpick into the center of a cupcake—if it comes out clean, they’re ready. Remove the tray promptly to avoid overbaking.
Cooling and Storing
- Cooling Tips to Maintain Moisture
After removing the cupcakes from the oven, allow them to cool in the tray for 5 minutes. Then, transfer them to a wire rack to cool completely. This step prevents condensation from forming at the bottom, which could make the liners soggy. - Storing Baked Cupcakes for Freshness
Once cooled, place the cupcakes in an airtight container to keep them moist. Store at room temperature for up to 3 days, or refrigerate them for up to a week. If you plan to frost them later, you can freeze the cupcakes for up to 3 months—just thaw them at room temperature before decorating.
Frosting and Decoration
Perfect Frosting for Gluten-Free Red Velvet Cupcakes
Frosting is undeniably the crowning glory of any cupcake. Moreover, when it comes to gluten-free red velvet cupcakes, a smooth, tangy, and decadent topping truly elevates the dessert. Not only does the right frosting enhance the flavor, but it also adds a visual appeal that makes your cupcakes irresistible. Therefore, let’s dive into the details of whipping up the perfect cream cheese frosting. Additionally, we’ll explore creative decoration ideas that can transform your cupcakes into edible works of art. Finally, for those with dietary restrictions, we’ll discuss dairy-free alternatives so everyone can indulge without hesitation!
Cream Cheese Frosting Recipe
Cream cheese frosting is a classic pairing for red velvet cupcakes, adding just the right amount of sweetness and tanginess. Here’s how to make it:
Ingredients:
- 8 oz (225g) cream cheese, softened
- 4 tbsp (60g) unsalted butter, softened
- 2 cups (250g) powdered sugar
- 1 tsp vanilla extract
Preparation Steps:
- In a large mixing bowl, beat the softened cream cheese and butter together until smooth and fluffy.
- Gradually add the powdered sugar, one cup at a time, mixing well after each addition.
- Stir in the vanilla extract and continue to beat until fully combined and creamy. Adjust the sweetness by adding more sugar if desired.
Creative Decoration Ideas
Your gluten-free red velvet cupcakes deserve a touch of flair! Use a piping bag with a star or round tip to create beautiful frosting swirls. Garnish with:
- Sprinkles: Choose colors that match your theme or season.
- Edible Flowers: Add elegance and charm.
- Dusting: Lightly dust cocoa powder or powdered sugar for a simple yet elegant look.
Vegan and Dairy-Free Frosting Options
For those avoiding dairy, these frosting options are fantastic substitutes:
- Coconut Cream Frosting: Chill coconut cream, whip it until fluffy, and sweeten with powdered sugar and vanilla.
- Cashew Frosting: Blend soaked cashews with maple syrup, vanilla, and a splash of almond milk for a creamy, nutty alternative.
With frosting and decorations complete, your gluten-free red velvet cupcakes are ready to steal the spotlight! In the next section, we’ll tackle common baking challenges and share expert tips to ensure success every time.
Troubleshooting and Tips
Common Issues in Gluten-Free Red Velvet Cupcakes
Why Cupcakes May Turn Out Dry or Crumbly
One common problem in gluten-free baking is dryness, often caused by using the wrong flour or insufficient liquids. Overbaking can also sap moisture. To avoid this, use a gluten-free flour blend designed for baking and measure liquids carefully.
Solving Density or Sinking Problems
If your cupcakes are dense or sink in the middle, the batter might be overmixed or too heavy. Gluten-free batters need a light hand—mix just until combined. Also, ensure your baking soda and vinegar are fresh for optimal rise.
Pro Tips for Perfect Gluten-Free Cupcakes
Balancing Moisture and Fluffiness
Adding ingredients like yogurt or applesauce, for example, can significantly enhance moisture in your cupcakes without negatively affecting their texture. However, it’s equally important to balance these additions with enough dry ingredients to maintain the structure and avoid a gummy consistency. Furthermore, consider measuring both wet and dry components precisely to achieve the ideal balance. As a result, your gluten-free red velvet cupcakes will turn out moist, fluffy, and perfectly textured every single time!
Testing for Doneness Without Gluten-Based Cues
Without gluten, traditional cues like a firm top may not apply. Instead, check doneness by gently pressing the top—it should bounce back—or insert a toothpick to ensure it comes out clean.
Frequently Asked Questions About Gluten-Free Red Velvet Cupcakes
Curious about the ins and outs of making gluten-free red velvet cupcakes? Here are answers to some of the most commonly asked questions to ensure your baking journey is smooth and successful.
Can I Make Vegan Gluten-Free Red Velvet Cupcakes?
Absolutely! Turning your gluten-free red velvet cupcakes into a vegan-friendly version is easy. Substitute eggs with flaxseed meal (1 tablespoon flaxseed meal + 3 tablespoons water = 1 egg) or unsweetened applesauce. For buttermilk, mix almond milk with a teaspoon of lemon juice or vinegar. Opt for coconut cream or cashew frosting instead of cream cheese for a delicious vegan topping.
What Is the Best Gluten-Free Flour for Cupcakes?
The key to creating soft and fluffy gluten-free desserts lies in selecting the right flour, which is crucial for success. Furthermore, opting for a pre-mixed gluten-free baking flour blend is the simplest and most reliable choice for consistent results. Typically, these blends contain rice flour, tapioca starch, and xanthan gum, all of which work together to mimic the elasticity of traditional flour. In addition to their convenience, they save you the hassle of combining individual ingredients.
How Do I Store Gluten-Free Red Velvet Cupcakes for Freshness?
To keep your gluten-free red velvet cupcakes fresh and moist, store them in an airtight container at room temperature for up to three days. If you’re planning to keep them longer, refrigerate or freeze them. For frozen cupcakes, thaw them at room temperature and frost them just before serving to preserve their texture and flavor.
Are Gluten-Free Red Velvet Cupcakes Allergy-Friendly for Kids?
Yes! These cupcakes are free of gluten and can easily be adapted to accommodate other allergies. For dairy-free versions, use plant-based buttermilk and frosting. For nut allergies, avoid almond or coconut flours and stick to certified nut-free gluten-free flour blends. Always double-check ingredient labels to ensure your recipe is safe for everyone.
Wrapping Up: Gluten-Free Red Velvet Cupcakes Made Easy
Congratulations! You’ve got all the knowledge you need to bake the most delightful gluten-free red velvet cupcakes. Whether it’s for a special occasion or just to treat yourself, these cupcakes are sure to impress with their vibrant color, tender crumb, and irresistible flavor.
Remember, baking is as much about creativity as it is precision. Don’t hesitate to experiment with ingredients or try new decorations to make your cupcakes uniquely yours. Each batch is a chance to learn and perfect your craft.
Now, it’s your turn to get in the kitchen, whip up a batch, and enjoy the sweet satisfaction of homemade gluten-free desserts. Happy baking!


1 thought on “How to Make Gluten-Free Red Velvet Cupcakes: Step-by-Step Guide”